Mastering Instrument Transfer: A Dental Assistant’s Guide to Efficient & Safe Chairside Assisting
You’re sitting in the dental chair, maybe a little nervous, and you notice the smooth way the dentist and their helper work together. Tools pass back and forth quickly but easily, with no dropping or delays. Have you ever wondered how dental assistants make passing sharp, small tools look so simple? Or maybe, as a dental assisting student or new hire, you’re thinking: “How am I supposed to hand each tool to the dentist – and why does it even matter so much?”
If that’s your question, you’re in the right place. Passing instruments is more than just giving over a tool. It’s about safety, working fast, and being a real team. Whether you’re getting ready for your first time in the clinic, brushing up on your skills, or just curious, I’ll walk you through everything. You’ll learn why this skill is important, how to do it step by step, and what you can start doing right now to become the helper every dentist wants.
In This Article
- Why Proper Instrument Transfer Is Important for Dental Assistants
- The Basics: Four-Handed Dentistry & Work Areas
- Main Principles for Good & Safe Instrument Transfer
- Getting Ready: How to Position Yourself and Set Up the Tray
- Step-by-Step Guide to Basic Instrument Passing
- Safety and Working Faster: What Else to Keep in Mind
- Common Mistakes to Avoid
- How to Practice & Get Better at Passing Instruments
- Conclusion: Becoming a Great Chairside Assistant
Why Proper Instrument Transfer Is Important for Dental Assistants
Let’s answer a basic question first: Why do we care so much about how dental tools are passed? Isn’t it just “give it to the dentist and move on”?
Not really! Smart, careful instrument passing is what keeps everyone’s dental visit safe and easy—both for the team and for people in the chair. Here’s why:
- Faster For Everyone: Good teamwork (what we call four-handed dentistry) can cut down treatment times by almost 30%. That means less time in the chair for patients, and a more relaxed day for everyone.
- Sharp Tools & Safety: Dental tools can be sharp and even dangerous. Almost one-third of dental assistants get poked or cut by a sharp tool every year. Passing tools the right way helps stop these injuries.
- Cleanliness & Germs: Every tool goes in someone’s mouth, or will go in someone’s mouth. Good passing skills help stop germs from spreading.
- Teamwork: A fast, quiet handoff shows trust and good communication. The dentist can focus on the treatment and knows just what to expect from their helper.
- Healthy Team: Dentists and assistants can get sore backs and tired arms from stretching too much. Good passing skills can help stop aches and pains.
So, learning to hand over tools the right way isn’t just to make the dentist’s life easier. It helps keep everyone safe and working well together.
The Basics: Four-Handed Dentistry & Work Areas
Before you pick up your first tool, let’s talk about the room setup. Four-handed dentistry isn’t just a fancy word; it’s the way a dentist and a helper work together smoothly.
What Does “Four-Handed Dentistry” Mean?
It means two pairs of hands—one from the dentist, one from the helper—work together like a team. Like a dance: one person leads and the other helps out.
To do this, you need to know the work areas:
- Dentist’s Area: Where the dentist sits or stands—their “home base.”
- Assistant’s Area: This is your spot! You usually sit a little higher than the dentist, so you can see well.
- Passing Zone: This is where you pass tools, usually just above the patient’s chest (not over their face). It’s not too far away for either of you, and always easy to reach.
- Extra Area: This is behind the patient, for things you don’t need much during the treatment.
Why do these areas matter? Because moving in and out of these areas in a smart way keeps everything calm and safe. It’s like how cooks put their tools out before they start cooking, so they don’t waste time searching for things.
Main Principles for Good & Safe Instrument Transfer
Passing a tool isn’t just about giving it over. Each handoff should have a flow and a method. Here are the main ideas to remember:
- Look Ahead (Don’t Just Wait): Start to know what tool the dentist will need next—a quick look, a hand motion, or a routine pattern.
- Watch the Dentist’s Signals: Passing is like a relay race. You want to look the dentist’s way, see where their hand is, and line up the tool the right way.
- Tool End Faces the Mouth: Always give tools so the working end (the sharp or pointed part) is pointed toward where it will be used in the mouth.
- Smooth Moves: Pass and take back tools in the right spot (passing zone) with gentle, steady hands. This stops dropping, poking, and confusion.
Think of it like a relay baton: If you hand it over pointed at someone, backwards, or too fast, it could get dropped or hurt someone. Dental tools are the same.
Getting Ready: How to Position Yourself and Set Up the Tray
Before your first patient, set yourself up so things go smoothly.
How You Sit
- Sit a little higher than the dentist so you can see and reach easily.
- Keep your feet on the ground, back straight, and elbows nearby—this helps you feel good all day and not get tired.
Setting Up the Tray
- Lay out tools in the order you’ll use them. For example: mirror and explorer first, then scalers, then the tools for fixing teeth.
- Put the same kinds together (like putting all forceps together).
- Know what each tool is for. Not sure? Ask someone or review a dental practical guide until you know them all.
A neat setup doesn’t just look nice—it lets you work faster every single time you pass something.
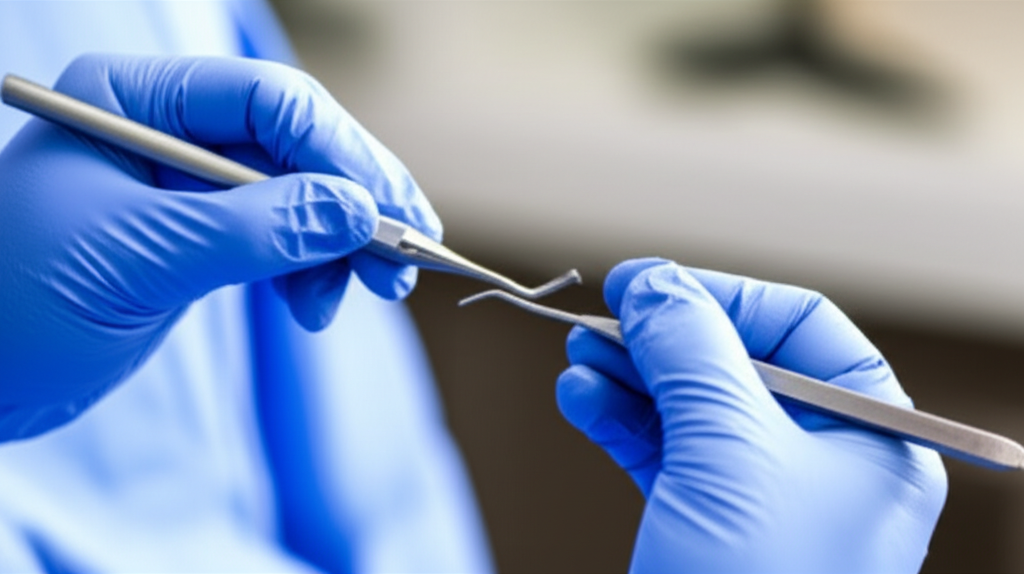
Step-by-Step Guide to Basic Instrument Passing
Let’s talk about how to really do it. Here’s how to hand over tools, with some examples for you to practice.
Passing Usual Hand Tools (Mirror & Explorer)
This happens in just a moment but makes everything run more smoothly.
How to Hold and Give Each Kind of Tool
Pen Hold (Explorer, Mirror, Cotton Pliers):
Hold the end that doesn’t go in the mouth, like holding a pen. The dentist will take it the same way.
Better Pen Hold (For smaller tools):
Add your ring finger for more control—the dentist does the same.
Full Hand Hold (Forceps, Rubber Dam Forceps):
Wrap your whole hand around the handle, and let the dentist grab with their palm for good grip.
Full Hand + Thumb Hold (Surgical Tools):
Hold the handle with the working end facing away from everyone.
Each way to hold a tool is picked for the job and for safety. Choose the best one for that tool.
Special Instrument Transfers
Hinged Tools (Scissors, Hemostats, Needle Holders):
Always close the sharp parts, have the tips facing away, and hold them by the middle. Never pass an open sharp tool.
Drills and Handpieces (High-Speed, Low-Speed):
Hold them by the hose, make sure there are no knots, and offer the handle first for the dentist to grab.
Air/Water Syringe, Suction:
You might have to pass these while another tool is being used. Work together, and make sure the tubes don’t bother the patient.
Bigger Tools (Curing Light):
Give the handle first, and make sure there’s space for the dentist’s hand.
Safety and Working Faster: What Else to Keep in Mind
Your skills don’t just make the dentist happy—they keep everyone safe, too. Here are some key points:
Sharp Tool Safety
- Always pass in the passing zone—never over the patient’s face or lap.
- For needles, use the “one-handed scoop” trick to put the cap back on—unless your office has safety caps.
- Throw sharp things away right after using them—never leave them lying out.
Keeping Things Clean
- Wear gloves every time. Change them if you touch something dirty.
- Don’t touch your face, phone, or notes with gloves on.
- Clean well: Tools must be cleaned very well between patients and kept clean during work.
Comfort for Patients
- Never reach over the patient’s face. That feels weird and sometimes scary.
- Keep tools away from their eyes—no one likes to see a sharp thing coming!
- If a patient looks confused, explain simply: “I’m giving the dentist a mirror so we can look at your back teeth.”
Common Mistakes to Avoid
Even people with lots of practice can get these wrong sometimes:
- Not Ready: If you have to stop mid-treatment to look for a tool, you waste time and break the flow.
- Dropping Tools: This can make things dirty or even cause injury.
- Wrong Way Around: If the dentist has to turn the tool around, that’s just more wasted time.
- Reaching Over the Patient: This feels uncomfortable and can make them nervous. Always work from the side.
- Bad Communication: If you and the dentist aren’t clear about your hand signals or what you want, the whole process slows down.
How to Practice & Get Better at Passing Instruments
Becoming a great assistant doesn’t happen overnight, but you can get there quicker if you:
- Watch the Best: Look at how the most experienced assistants do it. Notice their rhythm and how they set up their tray.
- Practice Lots: The more you do it, the easier it gets. You can even practice with a friend or by yourself at home.
- Ask for Advice: Ask your dentist or teacher to watch you and give tips. Even small changes can help.
- Stay Open to Learning: As new tools come out—think scanning or 3D-printed dental gear—be ready to learn how to pass them too.
- Remember Your Posture: Keep your body in a comfy, healthy position. Your back and hands will feel much better!
Conclusion: Becoming a Great Chairside Assistant
Let’s wrap this up with the most important things to remember for passing tools in the dental office:
- Being Fast Takes Work: Lay out your tools right, and start to guess what the dentist needs before they ask.
- Safety Comes First: Always follow the rules for sharp tools and keeping things clean.
- Make the Patient Comfortable: Every movement should help the patient feel calm and help the team work as one.
- We All Make Mistakes—Just Learn and Move On: Every day, you’ll get better and more confident.
- Take Care of Yourself: Good habits now mean a healthy, happy future in your job.
Your To-Do List:
- Review how to hold and pass each tool before every shift.
- Lay out your tray in a way that makes sense—and double check it.
- Practice with a friend, mentor, or even with kitchen spoons (it really helps!).
- If you’re unsure, just ask. Learning more is always smart.
- Be proud of small wins—even a simple, smooth handoff is a big deal!
For more ways to grow as a dental assistant, you can check out patient dental resources or learn about great teamwork through our dentist profiles.
Frequently Asked Questions About Passing Instruments to a Dentist
Q: How can I get faster at passing tools?
A: Practice a lot! Try going through the order of tools at home or with another student. Focus on your hands, your tray, and watching the dentist’s signals.
Q: What if I drop a tool?
A: Don’t worry. Pick it up and take it out of the work area, grab a clean one, and let the dentist know if you need to. Never use a tool that’s been on the floor or somewhere dirty.
Q: Should I say the name of each tool out loud?
A: Usually, no. The best teams pass tools quietly. If you’re new, saying the name quietly can help, but soon you’ll just use hand signals.
Q: How do I pass tricky things like handpieces or the curing light?
A: Each big tool has its own best way. Hold it by the handle or hose, and give it so it fits nicely in the dentist’s hand.
Q: Can I ever pass tools over the patient’s face?
A: No way! Always use the passing zone above the chest, to the side. That’s much safer and less scary for the patient.
What’s Next?
Whether you’re new or have done this for years, always remember: practice and paying attention make you better every day. Passing instruments is more than just a skill to learn—it’s what keeps your patients safe, your team strong, and your job rewarding.
So next time you pick up that mirror or explorer, take a breath, think through your moves, and pass with confidence. Your dentist (and your patients) will really appreciate it.
Want to learn more about tools or lab work in dentistry? Take a look at our crown and bridge lab to see how dental appliances are made.